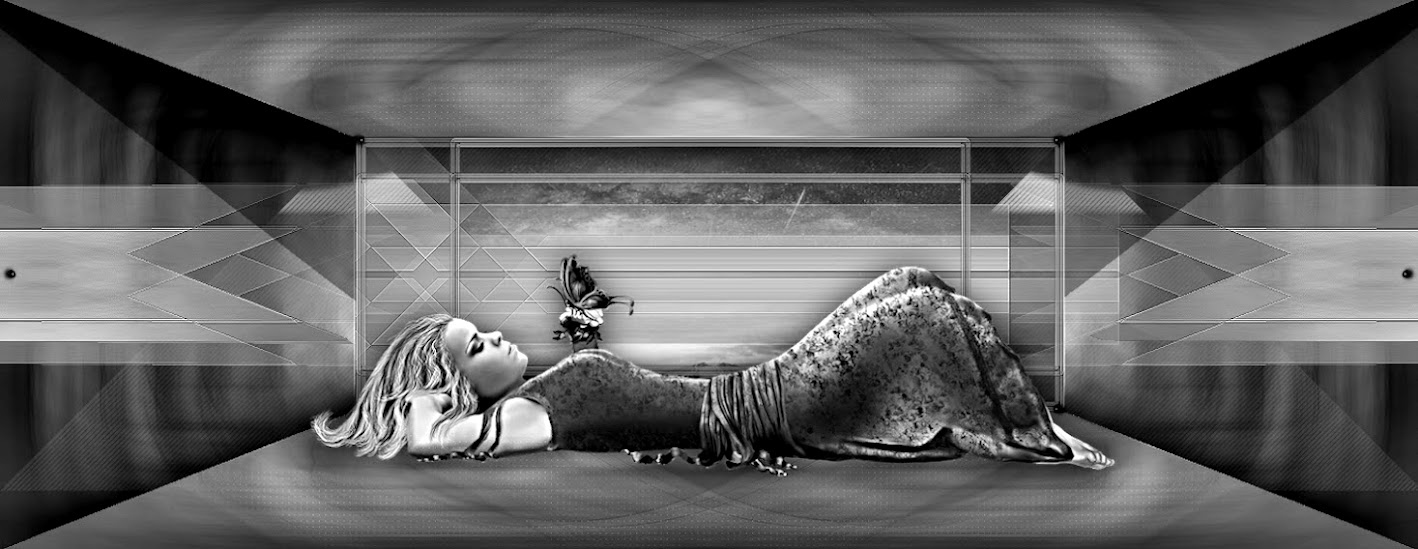
Gelo preto matinal
Este tutorial é da autoria de Cloclo

Obrigado por a sua confiança e o seu pedido para a tradução dos seus tutoriais
Nota da Autora:
É estritamente proibido copiá-lo ou distribuí-lo na web, blogs, fórum sem minha permissão por escrito.
Este tutorial foi realizado com Corel PaintShop pro 2020
Mas também pode ser realizado com outras versões PSP
traduzido com PSP ult. 2019
(se utilizar tubes com licença, não esqueça de a colocar sobre o seu trabalho)
Tutorial original AQUI
Versão conforme ao original:

A minha versão: tube de Béa, outros do material, Obrigado
Animal e paisagem por mim

Material a descarregar no site da autora
clica dupla no preset Shadow_cloclo.f1s , ele instala-se automaticamente
Plugins:
Textures / Grain
MuRa's Meister / Perspective Tiling
Alien Skin Eyes Candy 5, impact / Perspective Shadow
Graphics plus / Cross shadow
I.C.NET software / Filters Unlimited / Paper texture
AAA Frames / FOTO FRAME
:::
User defined filter / Emboss 3
Roteiro:
1
Cores:


2
Carregar o ficheiro canal_alpha_verglas_du_matin
Duplicar, fechar o original e trabalhar sobre a copia
Carregar a imagem hiver
Edit/ copy
Selections / Select all
Edit/paste into selection
Remover a seleção
Effects, image effects, seamless tiling , Default

Adjust, blur, motion blur:

Adjust, blur, gaussien , Radius a 20

Prepara um gradiente de cores (gradient)
Couleurs: Foreground/backgroung, Linear

Juntar uma nova layer
Preencher com o gradiente
Carregar ao mask Narah_mask_0629
Layers, new mask layer from image:

Layers, merge group
Effects, Edge effects, enhance
Effects, Image effects, seamless tiling, settings: Default
Effects, plugins: Texture / Grain

3
Carregar o mask ildikokjk_zelma_mask_03
Juntar uma nova layer
Preencher com a cor #cfd2c9 (background)
Layers, new mask layer from image:

Effects, edge effects, enhance
Layers, merge group
Effects 3D, drop shadow -2 / 15 / 65 / 40 , preto
4
Effects, textures effects , weave (2 x branco)

Ativar a layer abaixo
Carregar o misted_hiver, Copier
Paste as a new layer , colocar bem ao centro
Effects, User defined filter, Emboss_3 / OK

Juntar uma nova layer
Selections / Select all
Carregar o tube déco, copy
Paste into selection
Remover a seleção
5
Ativar o topo das layers
Layers merge down
Duplicar esta layer
Effects, plugins: MuRa's Meister / Perspective Tiling:

Effects, reflection effects, rotating mirror:

Effects 3 D, drop shadow: 15 / 15 / 65 / 35 / Cor foreground
Edit, repeat, drop shadow
Effects, edge effects, enhance
6
Carregar o tube neige, copy
Paste as a new layer
Ativar a pick tool ( k), colocar:
Position X -70 / Y 499

( Letra M para desmarcar)
Carregar o tube deco1, copy
Paste as a new layer
Objects / Align / top
Carregar o tube deco2, copy
Paste as a new layer
Ativar a pick tool ( k), colocar:
Position X -2 / Y -9
( M )
7
Juntar uma nova layer
Selections, load a selection from alpha channel/ Sélections1

Preencher com a cor 2
Effects 3 D, Inner bevel:

Remover a seleção
Effects 3 D, drop shadow: 0 / 0 / 65 / 5 , preto
Duplicar esta layer
Ativar a pick tool ( k), colocar:
Position: X 119 / Y 129
( M )
Layers, merge down
Duplicar esta layer
Image, Mirror , Mirror horizontal
Layers, merge down
Adjust, sharpness, sharpen
8
Carregar o tube deco3 , copy
Paste as a new layer
Ativar a pick tool ( k), colocar:
Position X 27 / Y 129
(M)
Carregar o tube femme (mulher), copy
Paste as a new layer, colocar em baixo à direita
Effects, plugins: Alien Skin, Eye Candy 5, impact, Perspective Shadow, aplicar o Preset Shadow_cloclo
basic se necessàrio:

Carregar o tube cerf , copy
Paste as a new layer, colocar em baixo à esquerda
Effects, plugins: Alien Skin / Eye Candy 5, impact , Perspective Shadow, aplicar o Preset Shadow_cloclo (memorizado)
Image, add borders, symmetric:
2 px cor 4
Selections / Select all
Edit/copy
Edit/paste as a new image por precaução e deixe para depois
Sobre o seu trabalho:
Image, add borders, symmetric: 20 px branco
Selections / Invert
Edit/paste into selection (imagem memorizada)
Adjust, blur, gaussien , radius a 20
Effects, plugins: Graphics plus / Cross shadow, como à abertura

Effects, textures effects , weave, cores: Branco e #c0c0c0

Effects 3 D, inner bevel

Image, add borders, symmetric:
2 px cor 1
2 px cor 2
Selections / Select all
Image, add borders, symmetric: 40 px Cor 3 (branco)
Selections / Invert
Edit/paste into selection (imagem ainda memorizada)
Adjust, blur, gaussien, radius a 20
Effects, plugins: I.C.NET software / Filter Unlimited / Paper texture, Hemp paper 1

Selections / Invert
Effects 3 D , drop shadow: 5 / 5 / 80 / 40 , preto
Remover a seleção
Effects, plugins: A A A Frame / FOTO FRAME

Assinar e juntar o watermark da autora
Layers, merge all
Image, Resize, width a 1000 pixels
Salve em JPG
Tradução de:
Aucun commentaire:
Enregistrer un commentaire
Votre commentaire sera visible après modération